Single and multi-channel application examples
Training example on a single-channel image dataset
The default training images in MMYOLO are all color three-channel data. If you want to use a single-channel dataset for training and testing, it is expected that the following modifications are needed.
All image processing pipelines have to support single channel operations
The input channel of the first convolutional layer of the backbone network of the model needs to be changed from 3 to 1
If you wish to load COCO pre-training weights, you need to handle the first convolutional layer weight size mismatch
The following uses the cat dataset as an example to describe the entire modification process, if you are using a custom grayscale image dataset, you can skip the dataset preprocessing step.
1 Dataset pre-processing
The processing training of the custom dataset can be found in Annotation-to-deployment workflow for custom dataset。
cat is a three-channel color image dataset. For demonstration purpose, you can run the following code and commands to replace the dataset images with single-channel images for subsequent validation.
1. Download the cat dataset for decompression
python tools/misc/download_dataset.py --dataset-name cat --save-dir ./data/cat --unzip --delete
2. Convert datasets to grayscale maps
import argparse
import imghdr
import os
from typing import List
import cv2

def parse_args():
    parser = argparse.ArgumentParser(description='data_path')
    parser.add_argument('path', type=str, help='Original dataset path')
    return parser.parse_args()

def main():
    args = parse_args()

    path = args.path + '/images/'
    save_path = path
    file_list: List[str] = os.listdir(path)
    # Grayscale conversion of each imager
    for file in file_list:
        if imghdr.what(path + '/' + file) != 'jpeg':
            continue
        img = cv2.imread(path + '/' + file)
        img = cv2.cvtColor(img, cv2.COLOR_BGR2GRAY)
        cv2.imwrite(save_path + '/' + file, img)

if __name__ == '__main__':
    main()
Name the above script as cvt_single_channel.py, and run the command as:
python cvt_single_channel.py data/cat
2 Modify the base configuration file
At present, some image processing functions of MMYOLO, such as color space transformation, are not compatible with single-channel images, so if we use single-channel data for training directly, we need to modify part of the pipeline, which is a large amount of work. In order to solve the incompatibility problem, the recommended approach is to load the single-channel image as a three-channel image as a three-channel data, but convert it to single-channel format before input to the network. This approach will slightly increase the arithmetic burden, but the user basically does not need to modify the code to use.
Take projects/misc/custom_dataset/yolov5_s-v61_syncbn_fast_1xb32-100e_cat.py as the base configuration, copy it to the configs/yolov5 directory, and add yolov5_s- v61_syncbn_fast_1xb32-100e_cat_single_channel.py file. We can inherit YOLOv5DetDataPreprocessor from the mmyolo/models/data_preprocessors/data_preprocessor.py file and name the new class YOLOv5SCDetDataPreprocessor, in which convert the image to a single channel, add the dependency library and register the new class in mmyolo/models/data_preprocessors/__init__.py. The YOLOv5SCDetDataPreprocessor sample code is:
@MODELS.register_module()
class YOLOv5SCDetDataPreprocessor(YOLOv5DetDataPreprocessor):
    """Rewrite collate_fn to get faster training speed.

    Note: It must be used together with `mmyolo.datasets.utils.yolov5_collate`
    """

    def forward(self, data: dict, training: bool = False) -> dict:
        """Perform normalization, padding, bgr2rgb conversion and convert to single channel image based on ``DetDataPreprocessor``.

        Args:
            data (dict): Data sampled from dataloader.
            training (bool): Whether to enable training time augmentation.

        Returns:
            dict: Data in the same format as the model input.
        """
        if not training:
            return super().forward(data, training)

        data = self.cast_data(data)
        inputs, data_samples = data['inputs'], data['data_samples']
        assert isinstance(data['data_samples'], dict)

        # TODO: Supports multi-scale training
        if self._channel_conversion and inputs.shape[1] == 3:
            inputs = inputs[:, [2, 1, 0], ...]

        if self._enable_normalize:
            inputs = (inputs - self.mean) / self.std

        if self.batch_augments is not None:
            for batch_aug in self.batch_augments:
                inputs, data_samples = batch_aug(inputs, data_samples)

        img_metas = [{'batch_input_shape': inputs.shape[2:]}] * len(inputs)
        data_samples = {
            'bboxes_labels': data_samples['bboxes_labels'],
            'img_metas': img_metas
        }

        # Convert to single channel image
        inputs = inputs.mean(dim=1, keepdim=True)

        return {'inputs': inputs, 'data_samples': data_samples}
At this point, the yolov5_s-v61_syncbn_fast_1xb32-100e_cat_single_channel.py configuration file reads as follows.
_base_ = 'yolov5_s-v61_syncbn_fast_1xb32-100e_cat.py'

_base_.model.data_preprocessor.type = 'YOLOv5SCDetDataPreprocessor'
3 Pre-training model loading problem
When using a pre-trained 3-channel model directly, it’s theoretically possible to experience a decrease in accuracy, though this has not been experimentally verified. To mitigate this potential issue, there are several solutions, including adjusting the weight of each channel in the input layer. One approach is to set the weight of each channel in the input layer to the average of the weights of the original 3 channels. Alternatively, the weight of each channel could be set to one of the weights of the original 3 channels, or the input layer could be trained directly without modifying the weights, depending on the specific circumstances. In this work, we chose to adjust the weights of the 3 channels in the input layer to the average of the weights of the pre-trained 3 channels.
import torch

def main():
    # Load weights file
    state_dict = torch.load(
        'checkpoints/yolov5_s-v61_syncbn_fast_8xb16-300e_coco_20220918_084700-86e02187.pth'
    )

    # Modify input layer weights
    weights = state_dict['state_dict']['backbone.stem.conv.weight']
    avg_weight = weights.mean(dim=1, keepdim=True)
    state_dict['state_dict']['backbone.stem.conv.weight'] = avg_weight

    # Save the modified weights to a new file
    torch.save(
        state_dict,
        'checkpoints/yolov5_s-v61_syncbn_fast_8xb16-300e_coco_20220918_084700-86e02187_single_channel.pth'
    )

if __name__ == '__main__':
    main()
At this point, the yolov5_s-v61_syncbn_fast_1xb32-100e_cat_single_channel.py configuration file reads as follows:
_base_ = 'yolov5_s-v61_syncbn_fast_1xb32-100e_cat.py'

_base_.model.data_preprocessor.type = 'YOLOv5SCDetDataPreprocessor'

load_from = './checkpoints/yolov5_s-v61_syncbn_fast_8xb16-300e_coco_20220918_084700-86e02187_single_channel.pth'
4 Model training effect
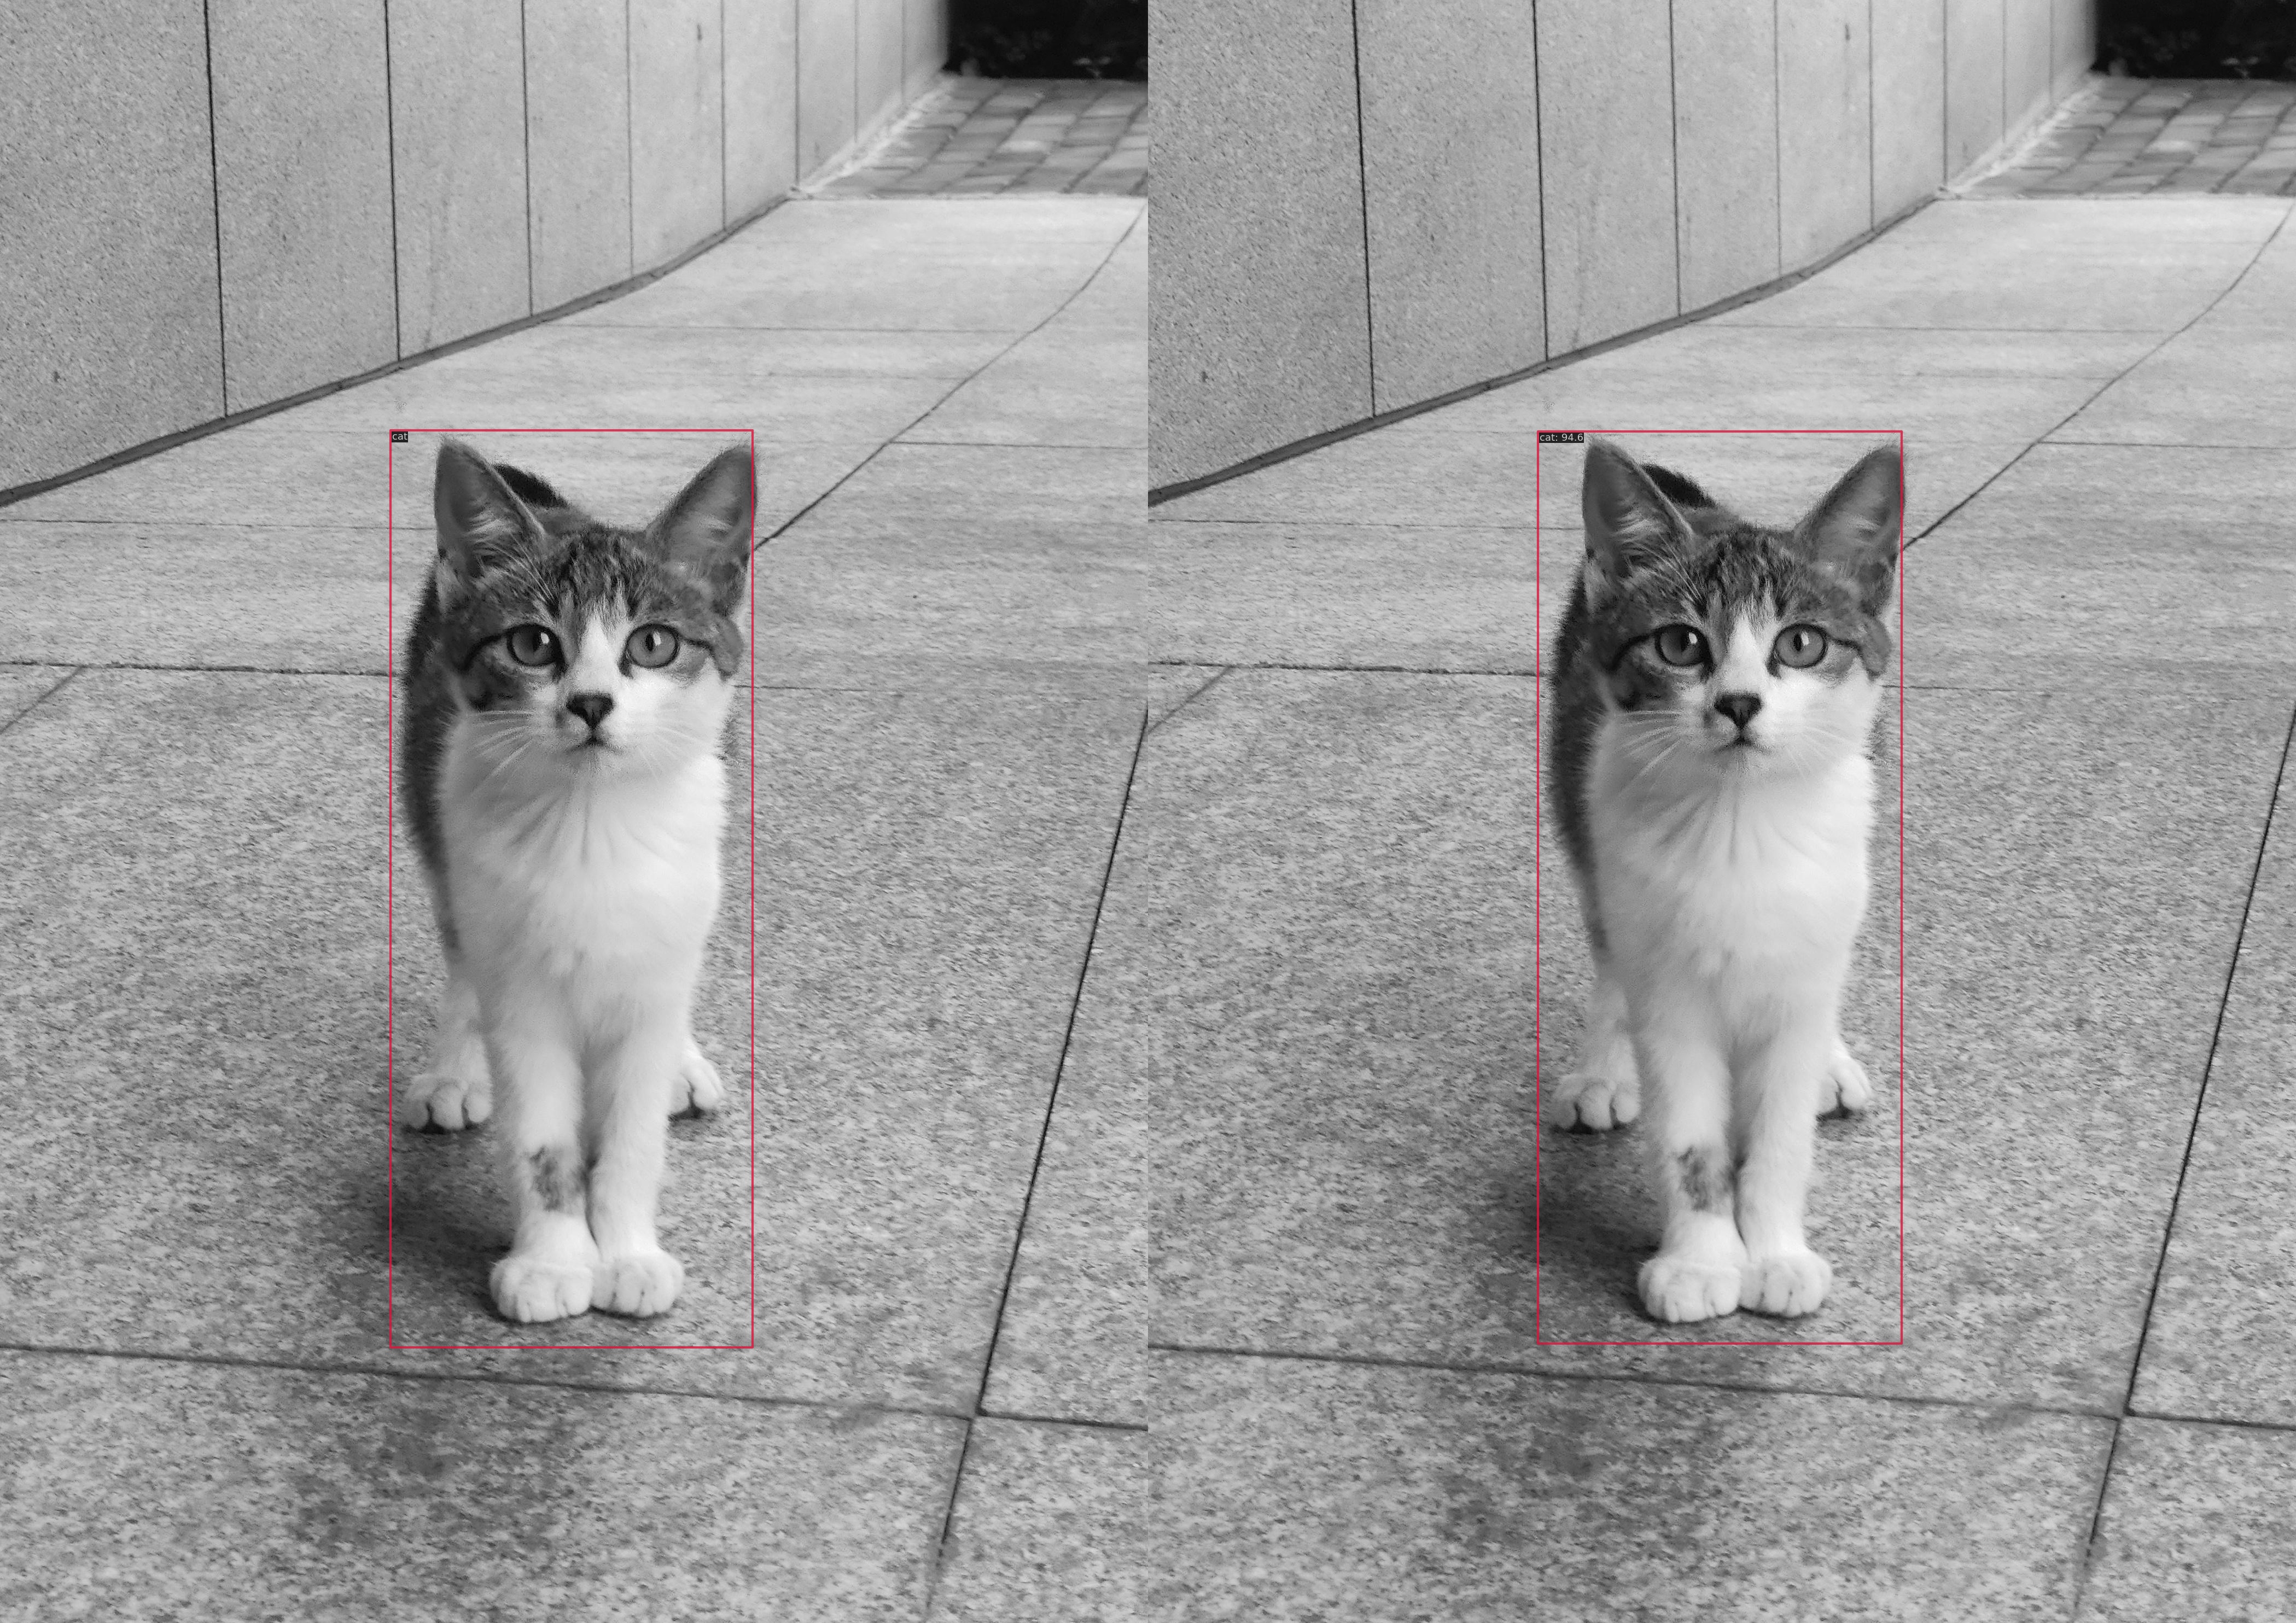
The left figure shows the actual label and the right figure shows the target detection result.
 Average Precision  (AP) @[ IoU=0.50:0.95 | area=   all | maxDets=100 ] = 0.958
 Average Precision  (AP) @[ IoU=0.50      | area=   all | maxDets=100 ] = 1.000
 Average Precision  (AP) @[ IoU=0.75      | area=   all | maxDets=100 ] = 1.000
 Average Precision  (AP) @[ IoU=0.50:0.95 | area= small | maxDets=100 ] = -1.000
 Average Precision  (AP) @[ IoU=0.50:0.95 | area=medium | maxDets=100 ] = -1.000
 Average Precision  (AP) @[ IoU=0.50:0.95 | area= large | maxDets=100 ] = 0.958
 Average Recall     (AR) @[ IoU=0.50:0.95 | area=   all | maxDets=  1 ] = 0.881
 Average Recall     (AR) @[ IoU=0.50:0.95 | area=   all | maxDets= 10 ] = 0.969
 Average Recall     (AR) @[ IoU=0.50:0.95 | area=   all | maxDets=100 ] = 0.969
 Average Recall     (AR) @[ IoU=0.50:0.95 | area= small | maxDets=100 ] = -1.000
 Average Recall     (AR) @[ IoU=0.50:0.95 | area=medium | maxDets=100 ] = -1.000
 Average Recall     (AR) @[ IoU=0.50:0.95 | area= large | maxDets=100 ] = 0.969
bbox_mAP_copypaste: 0.958 1.000 1.000 -1.000 -1.000 0.958
Epoch(val) [100][116/116]  coco/bbox_mAP: 0.9580  coco/bbox_mAP_50: 1.0000  coco/bbox_mAP_75: 1.0000  coco/bbox_mAP_s: -1.0000  coco/bbox_mAP_m: -1.0000  coco/bbox_mAP_l: 0.9580
Training example on a multi-channel image dataset
TODO